Views: 0 Author: Site Editor Publish Time: 2025-12-04 Origin: Site
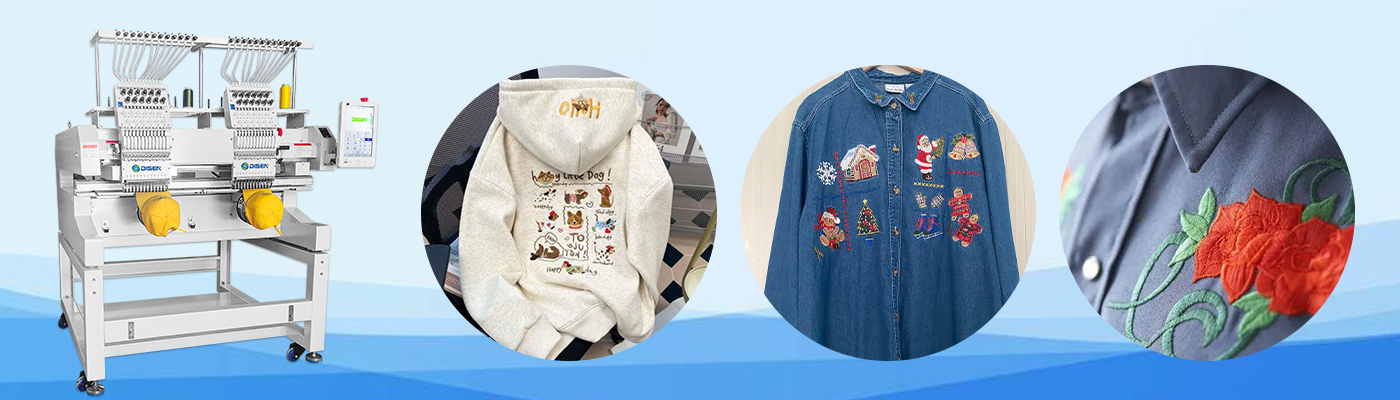
Embroidery remains one of the most durable and visually appealing decoration methods in the apparel industry. Whether used on T-shirts, hoodies, or denim jackets, embroidery enhances brand value and adds a premium, textured finish that printing methods cannot replicate. With the development of computerized multi-functional embroidery machines, modern apparel businesses can achieve high efficiency, detailed stitching, and consistent quality across large orders.
This article introduces a complete embroidery solution for various garments, showing how embroidery machines are used, how production is completed, and how different embroidery machine sizes support different embroidery ranges.
Embroidery offers a long-lasting and high-end aesthetic that works well on cotton, fleece, and denim fabrics. Unlike printing, embroidered logos and patterns do not fade easily after washing. This makes embroidery ideal for:
Brand logos on T-shirts
Large back patches on hoodies
Badges and decorative motifs on denim jackets
Name personalization for workwear and uniforms
With a computerized embroidery machine, these designs can be digitized with precision and reproduced consistently across hundreds or thousands of garments.
A key factor in producing quality embroidery is selecting the right machine based on embroidery area requirements. Different embroidery machines support different frame sizes and embroidery ranges:
Small embroidery range (10–20 cm):
Perfect for chest logos, sleeve badges, and small designs on T-shirts.
Medium embroidery range (20–40 cm):
Suitable for hoodie chest patterns, caps, larger back designs, and mid-size patches.
Large embroidery range (40 cm+):
ideal for oversized artwork on hoodies and detailed designs on the back panel of denim jackets.
By choosing the correct embroidery range, manufacturers can avoid repeated repositioning, reduce production time, and ensure smoother stitching.
Before any stitching begins, the artwork must be converted into a machine-readable embroidery file. This process is called digitizing.
The digitizing process includes:
1.Analyzing the design – checking fabric type, size, stitch density, and thread type.
2.Creating stitch paths – defining how the needle moves, direction of stitches, and layer order.
3.Assigning stitch types – such as satin stitches for lettering, fill stitches for large areas, and running stitches for outlines.
4.Testing the file – a sample stitch-out is produced to confirm quality before mass production.
A properly digitized file ensures the embroidery looks clean, prevents puckering on T-shirts, avoids thread breaks on hoodies, and maintains crisp details on thick denim fabric.
Once the file is ready, the garment must be stabilized and framed correctly.
a. Adding stabilizers
Lightweight stabilizers for T-shirts
(to prevent stretching during embroidery)
Medium stabilizers for hoodies
(to support fleece material)
Heavy stabilizers for denim
(providing structure for thicker fabric)
b. Hooping the garment
The garment is placed in a hoop that holds it firmly while the machine stitches. Proper hooping prevents shifting, which ensures clean and accurate embroidery.
c. Positioning accuracy
Laser pointers or frame sensors found in modern embroidery machines help align the design precisely on chest areas, sleeves, pockets, and back panels.

With the garment prepared, the embroidery machine begins automated stitching.
Key features of computerized multi-functional embroidery machines:
Multi-needle systems for fast color changes
High-speed stitching (usually 800–1200 SPM)
Automatic thread trimming
Real-time error detection
Stitching workflow:
1. The machine reads the digitized file.
2. It selects the correct thread colors.
3. The needle follows digitized stitch paths.
4. The machine automatically trims threads between color changes.
5. Once complete, the machine stops and the operator removes the garment.
Modern embroidery machines ensure stable performance and excellent consistency, making them suitable for both small batch customization and large-scale production.
After stitching is completed:
Finishing steps include:
Removing excess stabilizer
Cleaning loose threads
Light pressing or steaming
Inspecting stitch tightness and color accuracy
For denim products, a washing or distressing process may follow to blend the embroidery naturally with the garment’s finish.
Using computerized embroidery machines provides a full solution for decorating T-shirts, hoodies, and denim:
High efficiency for large orders
Precision details for complex logos
Wide embroidery range based on machine size
Durable, premium finish that enhances garment value
Whether you are producing fashion apparel, promotional clothing, sportswear, or personalized gifts, embroidery offers a versatile and professional decoration method that stands out in today’s market.


